This story was originally posted on May 9, 2013. There’s an update down below…
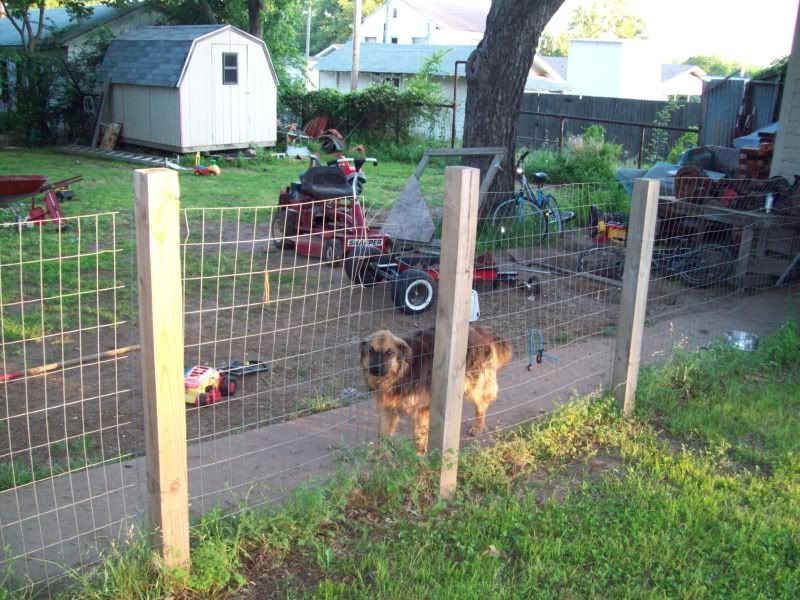
At long last, I finally have a new front fence. I could go digging through my photographs to show you its somewhat ugly predecessor — which I built with limited resources in 2010, just to try to keep my rabbits hemmed in—but no, we don’t need ugly temporary hacks here. It never really worked to corral the rabbits anyway.
The kind of fence I wanted was page wire, a wide-grid braided (wrapped, not welded, at the cross-points) wire fence that you find in farm country, with or without barbed wire to keep people out or critters in (some cattle will knock it down if they really want to, but it isn’t a safe fence for horses). However, when I easily found welded-wire fence at the hardware store, I bought it just to commit to the project. I posted it would look something like this when done, except with nice round cedar fence posts from the country, not square city posts.
Well, here we are, late February (oops, March)! Are you ready to design the layout of your garden and get your seeds started?
For those who have the space but haven’t planted a garden before, or for those who planning it anew this year, start with a rough plan: what to place where, by how much space and sun it will get. This will give you an idea how many seedlings you should have of each kind of plant.
I don’t always start seeds every year, and when I do, I’m almost always late at it (much later than February). It’s easy to get a little overzealous and end up tending tonnes of seedlings we have give away. Of course, you start by planting many seeds, because some never germinate, or else germinate and start, but then fail. If they succeed, extra seedlings can come in quite handy when you have space to add a few more good planters.
For as long as I’ve owned the house, I’ve had an IKEA blackboard in my kitchen. It’s been a source of amusement for many a guest, as you can see.
Eventually it wore out just from regular use, but also by grease aerosolized from cooking, so it really was no good anymore. Nonetheless, don’t toss out nice things if you have the will to repair them – and chalkboards can be resurfaced!
Meanwhile, after being in my kitchen for well over 17 years, I decided to replace the blackboard with this mug rack that I built of my own design. This in turn let me get rid of a certain cupboard off the wall, and open up my kitchen even more.
Breaking news: Five fugly mugs have since been replaced, either broken or swapped out by better ones and given away. The ones on the bottom shelf are still going strong!
I read online that you didn’t have to buy chalkboard paint at $16 a spray can or $25 a quart can. You could mix it yourself in whatever colour you wanted. The key ingredient is grout, specifically unsanded grout. So I borrowed a bag of this from a contractor friend, and fortunately I had a small quantity of black paint on hand. Bob Vila’s website has a good, standard guide on how to mix and apply it. Make sure to clean the surface well, and rub it with fine sandpaper, as you won’t be using a primer.
The surface of the blackboard wasn’t very large. For my work, I used a measuring cup to do the mixing, and it was a matter of just a couple of teaspoons of grout. I’d already taped the blackboard edges so work could go quickly. I painted it on using a 1-½” brush.
I waited a day between coats and another before final testing, to make sure it was good and cured. You don’t want to mar it with a permanent chalk mark by writing on it before it’s ready!
The surface was considerably rougher than any board you’d buy new at a store. Here’s a writing test:
By the way, this is the reverse of reality. Parker is a very good boy, and if anyone’s liable of being naughty, it’s Willa. They’re rabbits.
After I hung the blackboard in a new location, I inspected the chalk I had on hand. Like the blackboard, they’d been exposed to kitchen grease and dust the entire time. I used an old toothbrush to clean the surface of the chalk sticks:
In winter, birds keep warm by finding niches in which they can roost, and basically puff up and shiver all night long to stay alive. When the landscape is forested, there are lots of places they can go, but in the city, they have to be opportunists and find these niches wherever familiarity allows.
Birds are familiar with birdhouses (that’s what a nest box is, they’re the same thing, provided it’s functional – a lot of birdhouses are decorative), but they’re not the best configuration for winter roosting. While nesting, the birds brood their eggs and chicks on the floor of the box, with airspace above. Remember, cold air sinks. While roosting, the bird will want a sheltered space where their body heat is protected.
Fortunately, there’s a trick we can do to make a roost out of a nest box: Turn it upside down!
Of course it’s not quite that easy. You have to reconfigure the entry to the space to be at the bottom, add a perch inside, and then winterize it. This gallery of pics will show you how, using my front yard chickadee box:
A newly opened nest boxThis is the nest from the spring/summer seasonWithout takng the nest out, I’ve put the nest box upside downTo winterize, I’m using a cut milk carton with an entry notchThe milk carton fits inside Though you can’t see it very well, I’ve inserted a slim bamboo stake through the sides of the boxI’ve put the back on, and about to mount itHere it’s mounted back on the fence post
This project will rarely show you proof that the birds use it, but trust that they will. Maybe I ought to come up with a cam project so we can peek in on them!
If the base of your nest box is recessed and has corner drainage, you’ll have to either put a roof on it (because the base is now the ceiling) or wrap it against the elements using landscape cloth or burlap.
This is a long-running “lifestyle” blog about the pleasures of living like a farm kid in an urban context. There’s a big focus on ecology and wildlife because this has brought me joy – and this is also the greatest potential we have of restoring some balance to nature where we live.
I write practical content for people to do little projects that basically make things beautiful, but also support climate readiness (energy efficiency, heat reduction, drought tolerance, flood prevention, and more). I’m a relentlless promoter of having a live-and-let-live attitude towards biodiversity.
Comments and questions are welcome! And if you’re anywhere near the Montreal region, you can also use my “Rewilding” service to landscape your property using native plants, convert to a green driveway, and prevent your windows from killing birds.


